
Edge LM Devlog: Running a language model on a Raspberry Pi 5
Working on a Raspberry Pi (RPi) feels like a trip back to memory lane. My undergraduate degree was in electronics engineering, and I still remember my final year project which involved an RPi.1 Now that I’m in the field of NLP, I’m quite curious how we can fit large language models into these small devices. In this blog post, I document my journey in running a language model in a Raspberry Pi 5!
First, I want to lay down the price list:
- Raspberry Pi 5 16 GB RAM (230 GBP): it was my birthday so I had money to spare. Kidding aside, I chose to max out on specs because I want to measure the ceiling in which I can deploy language models. To the best of my knowledge, this is the largest you can buy unmodded.
- 32 GB microSD Card (27.50 GBP): I chose 32 GB because I want to work on a size that is a bit constrained, but not too limiting that I can’t store a mid-sized model.
- Active Cooler (4.80 GBP): I often see this recommended in all the tutorials I found and I’m glad I bought it. You actually notice your RPi heating up at max load, so it’s good to have a cooler to mitigate any damage to the board.
I actually bought the Essentials Kit from the Grand Arcade store at Cambridge, which is around 315 GBP. As someone who is getting back into RPi again, I think it’s worth it especially because the kit has added goodies like a dedicated case and a beginner’s handbook.
I wouldn’t go over setting up the RPi here since there are already many tutorials for that. As for my case, I attached the active cooler, flashed the RPi Imager to my microSD, and let the magic happen…and et voila! Back in the game:
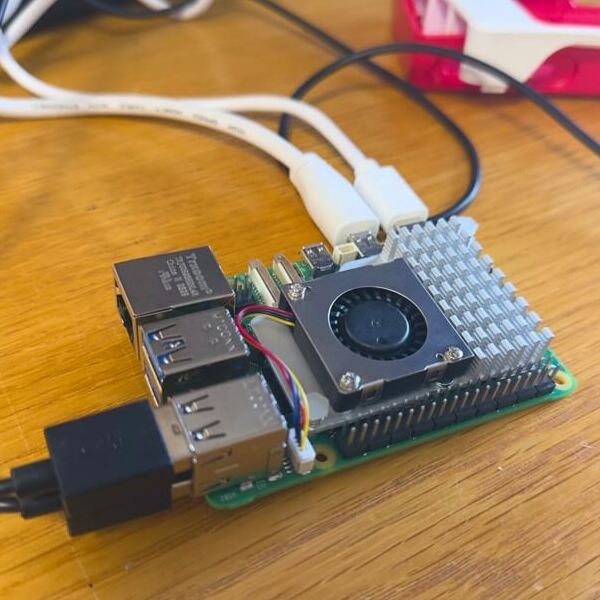
Running an inference server from RPi
The main goal here is to have a quantized version (or quant) of a model running on a local inference server. Specifically, I plan to use quants in the GGUF format served via llama-cpp. Interestingly, most RPi tutorials I found recommend ollama as an inference server. However, I am quite keen to use llama-cpp as it affords me more control and familiarity. Luckily, I found this really good tutorial by Wolf Paulus that guided me in my setup—I literally copied some steps from his blog. First things first, in a freshly-booted RPi, I ran the following:
sudo apt update
sudo apt install -y build-essential git perl python3 pkg-config python3-dev gfortran clang cmake libomp-dev libcurl4-openssl-dev
Building BLIS and llama-cpp
To build BLIS, we first clone the repository and set the necessary configurations.
Here, the flag -O3 means that we want to have an aggressive optimization during compilation for higher performance.
On the other hand, the flag -mcpu=cortex-a76 tells the compiler to target a specific ARM core in RPi 5 (which is Cortex-A76 in this case).
git clone https://github.com/flame/blis
cd blis
CFLAGS="-O3 -mcpu=cortex-a76" ./configure --enable-cblas -t openmp,pthreads auto
make -j
sudo make install
Then, we build llama-cpp. Same routine, we first clone from GitHub and pass the necessary flags for compilation:
git clone https://github.com/ggml-org/llama.cpp.git
cd llama.cpp

cmake -B build -DGGML_BLAS=ON -DGGML_BLAS_VENDOR=FLAME -DCMAKE_BUILD_TYPE=Release -DGGML_NATIVE=ON -DGGML_LTO=ON
cmake --build build --config Release -j"$(nproc)"
Wolf provides a good explanation of these flags.
The important ones here are GGML_BLAS=ON which toggles BLAS acceleration, and GGML_BLAS_VENDOR=FLAME which points to the BLIS libraries we just set up.
If things go well, you should be able to find llama-server in the build directory of the same repo:
# Inside the llama.cpp repository
$ build/bin/llama-server --version
0.00.000.357 I srv llama_server: initializing
version: 0.5.0-dev (build 11217, commit c9064dded)
built with GNU 14.2.0 for Linux aarch64
Downloading a model from HuggingFace
The llama-cpp server requires GGUF files to run. Good thing, most model providers provide these files with their releases, so we’re actually quite spoiled by choice. Given that, I decided to use LFM2.5-2.6B-Q4_K_M GGUF. Here, LFM is the name of the model (LiquidAI Foundation Model)2, 2.6B is the number of its parameters, and Q4_K_M is the quantization level (4-bits, k-quants, medium-sized).
I follow the same launch script from Wolf’s blog with a few changes such as mlock to --load-mode mlock and adding the recommended generation parameters from LFM’s model card.
I then saved this file to launch.sh:
#!/usr/bin/env bash
# launch.sh

# Directories
WORKDIR="/home/ljvm/Development/llama.cpp"
MODELDIR="/home/ljvm/Development/models"
BINARY="$WORKDIR/build/bin/llama-server"
MODEL_PATH="${MODEL_PATH:-$MODELDIR/LFM2.5-2.6B-Q4_K_M.gguf}"

# Threading settings
export BLIS_NUM_THREADS=1
export OPENBLAS_NUM_THREADS=1
export OMP_NUM_THREADS=1
export GOMP_SPINCOUNT=0

# Generation Settings and launch
echo performance | sudo tee /sys/devices/system/cpu/cpu*/cpufreq/scaling_governor > /dev/null
sudo swapoff -a
THP=/sys/kernel/mm/transparent_hugepage/enabled
[[ -f "$THP" ]] && echo madvise | sudo tee "$THP" > /dev/null
LLAMA_ARGS=(
    -m "${MODEL_PATH}"
    --port 8080 --host 0.0.0.0
    --temp 0.1
    --top-k 50
    --repeat-penalty 1.1
    --threads 3
    --load-mode mlock
)

cd "$WORKDIR"
exec taskset -c 0-2 env -- \
    BLIS_NUM_THREADS="$BLIS_NUM_THREADS" \
    OPENBLAS_NUM_THREADS="$OPENBLAS_NUM_THREADS" \
    OMP_NUM_THREADS="$OMP_NUM_THREADS" \
    GOMP_SPINCOUNT="$GOMP_SPINCOUNT" \
    "$BINARY" "${LLAMA_ARGS[@]}"
This script has three parts:
- the “Directories” simply set where the
llama-cppbinary and the GGUF model are located. - the “Threading Settings” manage the usage of the cores in RPi.
In our case, we tell
llama-cpp’s internal libraries to each use only a single thread, so they don’t spawn overlapping thread pools and compete with each other. - the last few lines simply set the generation arguments (based on LFM’s recommended parameters) and finally launch the server.
With that said, I can then run:
./launch.sh
# or
MODEL_PATH=path/to/gguf/file ./launch.sh
And now it works!
Opening up my browser and going to the URL indicated in the llama-cpp logs shows this chat interface.
I asked a simple question, and it’s pretty cool to see the model responding right away.
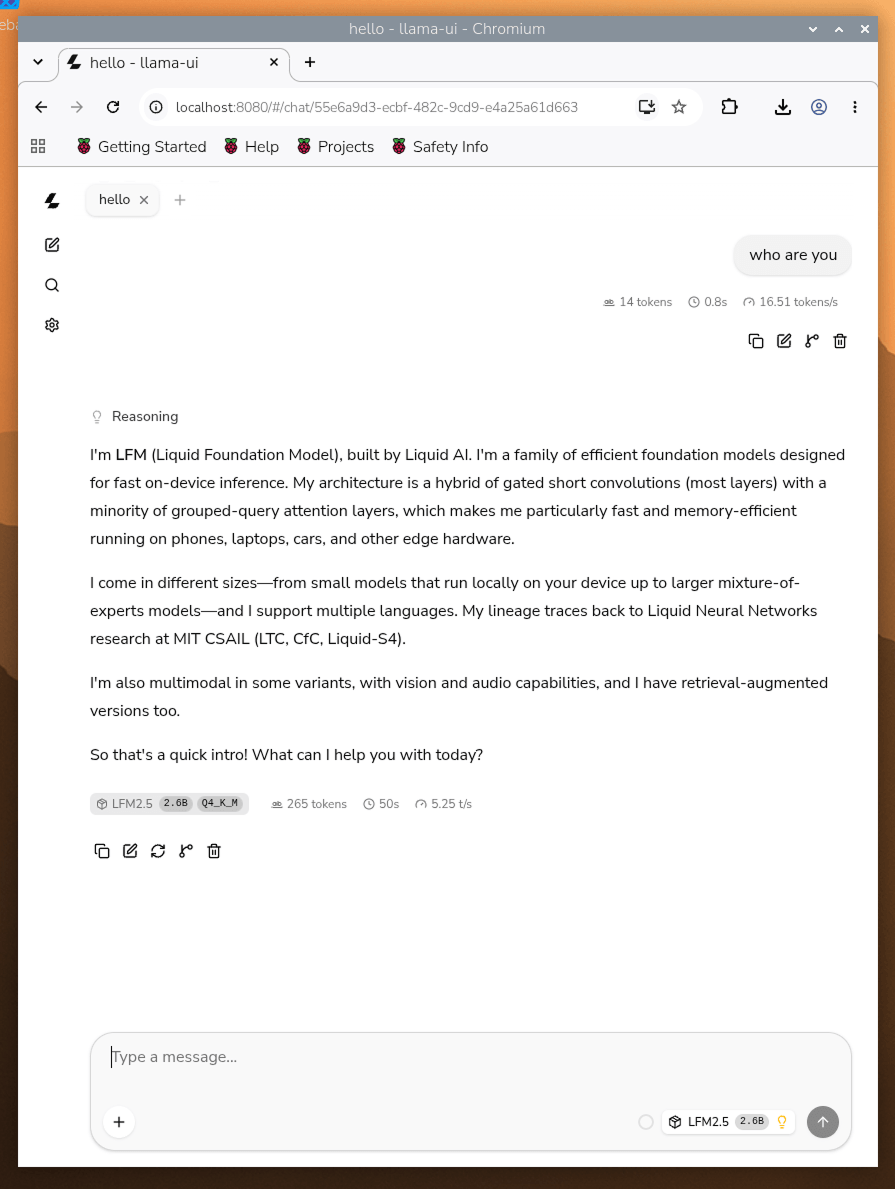
Yay! This opens up many possibilities.
In addition, since the llama-cpp server is HTTP, I can actually connect to the LLM running on my RPi from any machine.
I’ve already tried it on my Mac, but I know there are more secure ways of doing this, which I plan to explore in future blog posts, so stay tuned!
-
Look at this old blog post of mine from 2017! It’s also very fitting to know that Raspberry Pi started here in Cambridge! ↩
-
Liquid AI’s models were specifically built for edge and on-device applications. ↩