How to migrate from Disqus to Utterances in your Jekyll blog
Introduction
For the past three years, I’ve been using Disqus to manage discussions in my site. However, a few days ago, I’ve noticed that it added intrusive ads in my blog posts:

Figure: These ads are very off-putting. Bad move, Disqus.
They’re very off-putting, especially that it covers a huge area of the page. In addition, the only way to remove them is to subscribe and pay $10 a month! This bait-and-switch tactic left a bad taste, so I decided to leave Disqus for good.
Enter utterances, it’s an open-source, ad-free, comments widget that runs on top Github Issues. I’ve seen them before in Eugene Yan’s blog, so I decided to give it a spin. If all is still well, you should see the utterances comment widget at the bottom of this post— say hi!
In this blogpost, I’ll outline the steps I took to migrate all my Disqus comments into Utterances:
Setup utterances config and repository
-
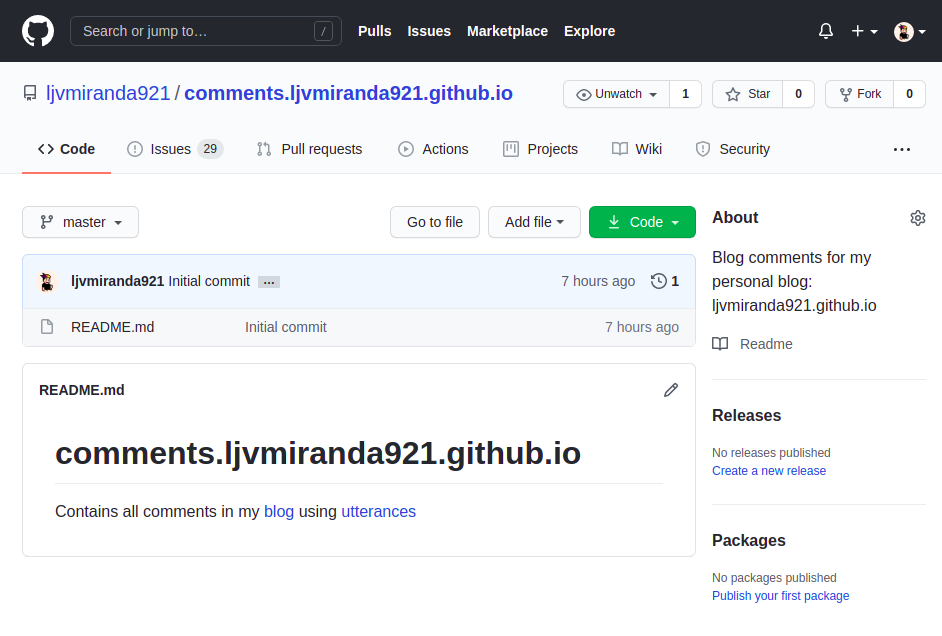
First, you need to decide on a repo to store your blog comments. In my case, I created a new public repo, comments.ljvmiranda921.github.io , that will house all Github Issues. It’s also possible to use your own Jekyll blog repository; I just opted not to because I use mine for project management and ideation purposes.

Figure: I created a dedicated repo for my blog comments -
Next, install the utterances Github app in said repo and configure it to your liking. This will allow the utterances bot to listen and push Issues into your Github repo.
-
Lastly, create a configuration script for utterances and add it to your site. Specify the
reponame andtheme. Forissue-term, I suggest usingtitlebecause that’s what our migration tool will use. Here’s a sample of my config:<script src="https://utteranc.es/client.js" repo="ljvmiranda921/comments.ljvmiranda921.github.io" issue-term="title" theme="github-light" crossorigin="anonymous" async> </script>I put this config in the
_layouts/post.htmlof my blog (see here). Ideally, you’d want to put it where you used to put your Disqus link.
Once you’re done, you should be able to see the comments widget right away even if you run Jekyll locally. If you just want to install Utterances, then we end at this step. For those who are doing the migration, we’re not done yet!
Export Disqus comments into XML
-
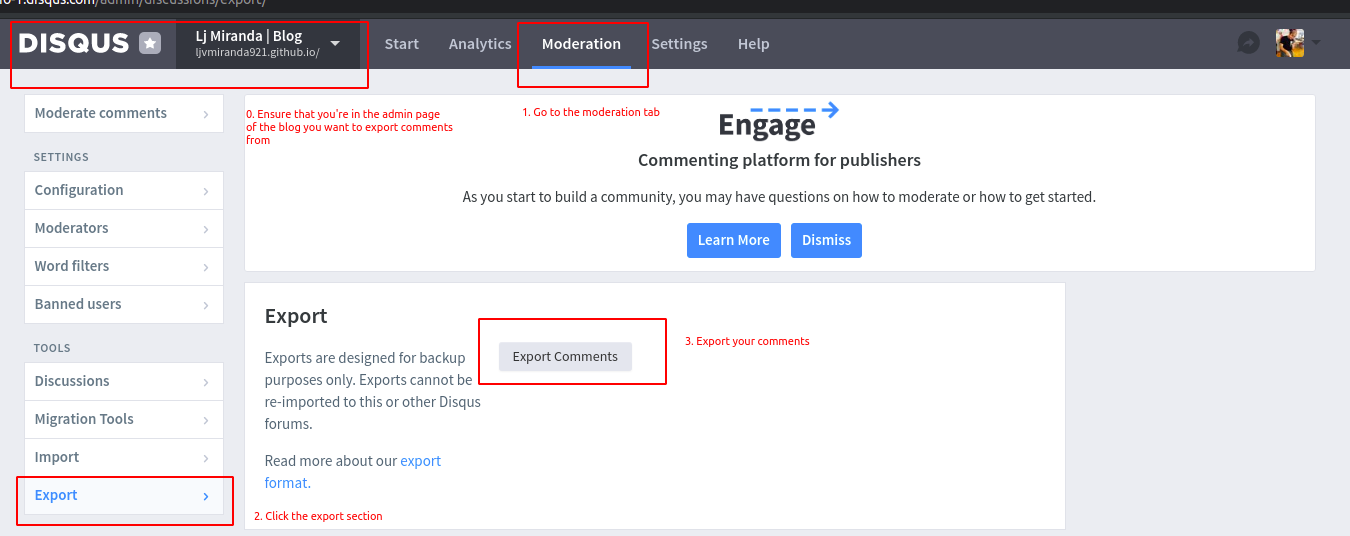
Turns out, you can export comments from Disqus into an XML format. What I just need to do is go to the admin page of my Disqus account, open the Moderation tab, and click the Export button. It will then send an email to your registered account with the XML format of all comments in your site.

Perform migration
In order to “migrate” all Disqus comments into our Utterances repo, we need to parse the XML file and populate the repo so that we have one Issue per blogpost, and one comment per entry. Fortunately, Juergen Gutsch has already made a script for us to use.
It’s in .NET, but he provided us a Dockerfile to make things smoother. (Thank you! Note: this will require Docker if you don’t know .NET).
-
First, I cloned the repo:
git clone git@github.com:JuergenGutsch/disqus-to-github-issues.git -
Then, I updated lines 112-113 of
DisqusToGithubIssues/Program.cswith my site name:cd disqus-to-github-issues # replace with your sitename export SITENAME=ljvmiranda921.github.io # you can also use your favorite text editor sed "s/asp.net-hacker.rocks/$SITENAME/" DisqusToGithubIssues/Program.cs -
Build the image,
docker build -t disqus-to-github-issues . -
Prepare your parameters,
export DISQUS_PATH=path/to/downloaded/disqus.xml export GITHUB_USERNAME=ljvmiranda921 # supply yours export GITHUB_REPONAME=comments.ljvmiranda921.github.io # supply yours export GITHUB_PERSONAL_ACCESS_TOKEN= # generate your own -
Then run the command:
 docker run
     --rm \
     -v $DISQUS_PATH:/app/disqus.xml \
     disqus-to-github-issues:latest \
     run \
         /app/disqus.xml \
         $GITHUB_USERNAME \
         $GITHUB_REPONAME \
         $GITHUB_PERSONAL_ACCESS_TOKEN
You can follow these
instructions
for creating a personal access token. You only need repo permissions, nothing
more. Once created, you’ll be given a short string that you should keep. Use it
as a value for the GITHUB_PERSONAL_ACCESS_TOKEN environment variable.
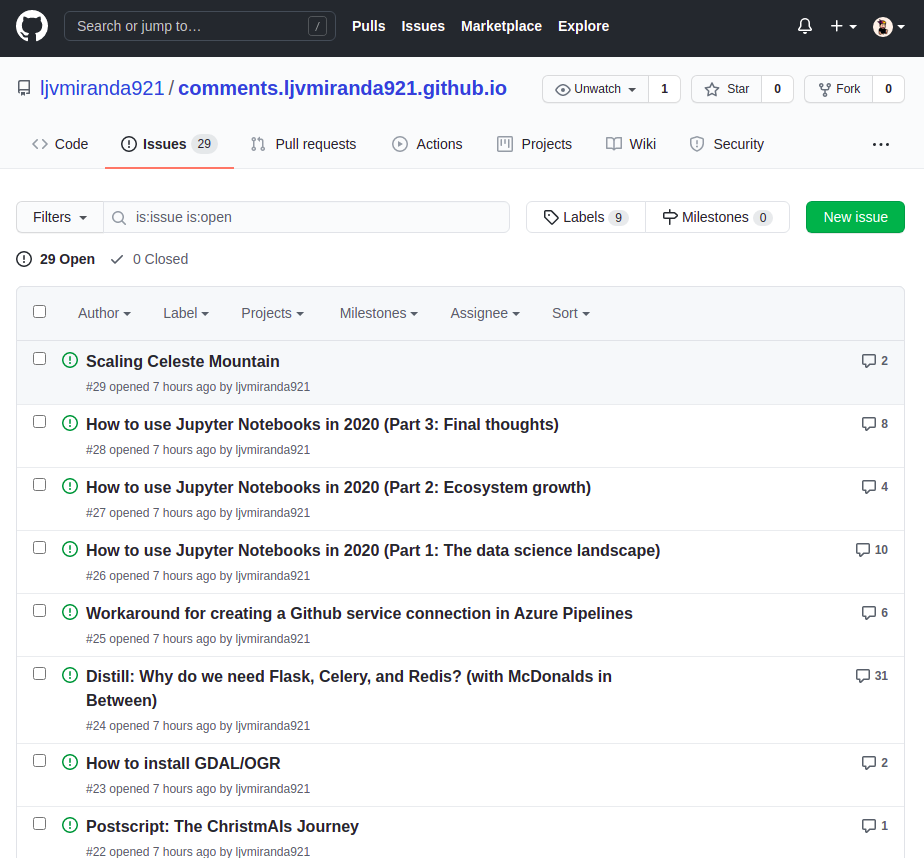
And done! In your terminal, you should see some logs that check if the URL path is valid, and that Issues are created. At the same time, you can also check your dedicated Utterances repo and see your Issue tab filling up!

Once the process is done, then you’ve successfully migrated from Disqus to Utterances— congratulations!
Conclusion
In this blogpost, I outlined the steps I took to migrate from Disqus to Utterances for my comment engine. I definitely prefer a ligtweight, open-source, and free solution so I opted for Utterances. Of course, there are some “caveats” in this system that I think I can live with:
-
No nested commenting Since it sits on top of Github issues, the comments in Utterances are all flat. I definitely miss this from Disqus, but I’m not necessarily bothered. I’ve been using Github Issues as discussion threads for the past few years, and I don’t think it will be a big problem.
-
No anonymous commenters I actually prefer it this way to reduce spam. Every user should log-in (or sign-up) to Github in order to make a comment. Fortunately, since I often write about tech and software, the majority of my readers usually have Github accounts.
-
Migration is not perfect There were five or six Issues created using old titles of my blogpost, so I need to update their Issues manually. It’s not a big deal to be honest, but just flagging it in case you noticed that some of your posts have missing comments. Also, because it’s not easy to map Disqus users to their Github accounts, all the migrated comments have your profile picture with some metadata— take this for example.
Given these, I still believe that the pros outweigh the cons. I think that I’ll be using Utterances for a long time. This solution has provided me with an ad-free and “clean” experience that I want for my readers. Let me know if you have any questions below!
Changelog
- 03-30-2021: Added numbered steps so that it’s easier to follow.
- 03-27-2021: Renamed title from “Migrating…” to “How to…”