How to improve software engineering skills as a researcher
Hello! You’re here because I rambled on how you can improve your software skills as a researcher. Maybe our conversation went this way:

You get it already…the field is quite huge and there are many ways to get started— I myself got overwhelmed before! Hence, here’s an exercise for you to learn relevant software skills with a tangible output in the end. Your mileage may vary, it worked for me and it’s one of many paths.
The exercise, is to:
Create a machine learning application that receives HTTP requests, then deploy it as a containerized app.
Um, what?
Let’s break it down a bit:
-
“Create a machine learning application…“. This should be a model that receives an input, transforms the data, and returns an output. It can be anything, and it depends on what you’re comfortable with. For example, you can make models for sentiment analysis, OCR of PDF documents, or predicting house prices. You decide!
-
“…that receives HTTP requests…“. If this is the first time you’ve encountered this, then don’t fret! In Python, this may be as simple as learning a new library. HTTP is a standard that allows computers to talk to one another. By allowing your ML application to receive HTTP requests, you’re setting-up the “language” between you and your users. With HTTP, users know how to give and receive data to your model.
-
“…then deploy it…“. Here you make your app accessible outside your computer! After setting up the communication standard in Step 2, you then open up the lines to give and receive data! There are many platforms that can do this, and I’ll list them down later.
-
“…as a containerized app.”: Today, containers are the most ubiquitous way of shipping things into production. Containerization wraps your application, all of its dependencies, and setup steps in a single package. It makes your app idempotent, so that you can run it on machines other than your own!
In short, we are building a Machine Learning (ML) Service. Service is a term you’ll hear a dozen times in the industry: software-as-a-service, microservice architecture, API services, kubernetes service, and more. I assure you that there is some relation among these terms. However, before we jump into the how, I want to talk about why creating an ML service is a perfect introduction to learning software for researchers and data scientists.
Note that this blogpost is not a tutorial. Instead, I’ll touch upon a skill roadmap that will enable you to build an ML service— i.e., how to get there.
Wait, but why an ML Service?
Here are my three reasons why building an ML service is a good introduction to software engineering:
-
Improves engineering sensibilities. Most applications treat ML models as software components. We feed input data, then receive an output in the form of a score or a prediction. Learning how to build ML services gives us a unique perspective on how machine learning happens outside of the train-eval loop.
In addition, the competencies needed to create such service covers a lot of the essential software skills to collaborate with engineers: version-control, software design, web paradigms, dependency management, and so on.
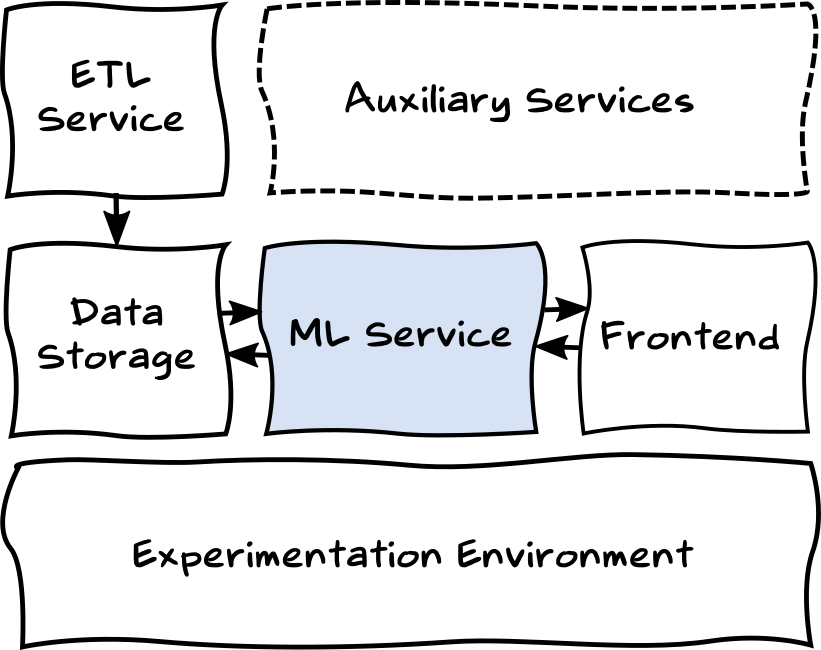
Figure: A very simplistic system architecture -
Increases familiarity with the ML workflow. We’re familiar with the ML experimentation workflow. In addition, there is also a productization workflow where we deploy our models, perform A/B testing, take care of concept drift, and more. I even imagine it as two cycles syncing together:
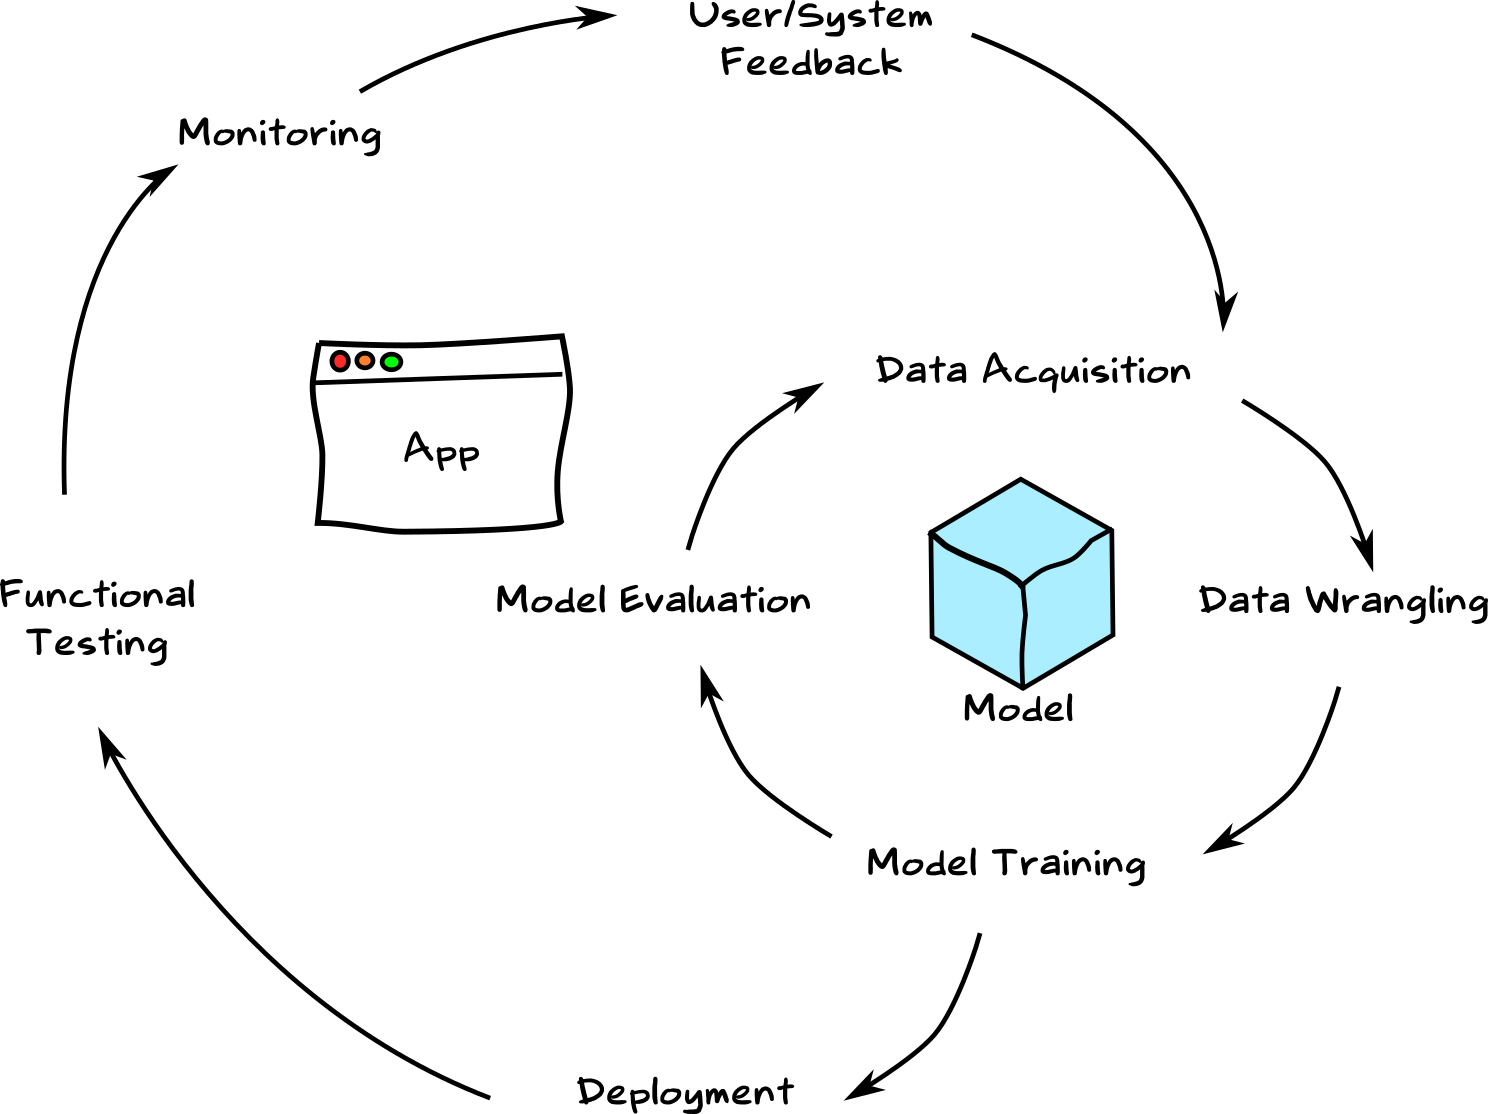
Figure: Machine Learning LifecycleBuilding an ML Service gives us a glimpse on how to productize models. We’ll start to think about data versions and model dependencies. As a researcher, being able to see a model end-to-end, from concept to production, provides insight on how to improve the products we work on.
As an aside, my fearless forecast is that the productization workflow will be democratized by up-and-coming ML Platforms and services. However, learning how they work, “to the metal,” while they are still relevant can be a good experience.
-
Another tool under your belt to create more cool stuff. Even if you won’t be working as a full-fledged ML Engineer or Developer, the technologies you’ll learn while building an ML Service enables you to do more things!

Figure: Three years ago with my first dip in software eng’gAs an academic, learning how to use Docker paves way for reproducibility. In addition, being more organized in writing code, in contrast to writing janky scripts here and there, can aid you in your research in the long-run. There’s a lot of things we can learn from software engineering to enhance our research workflows. For example, I used containers, version-control, and LaTeX to write my Masters thesis before! The opportunities are endless!
Ok, so how?
Now that we’ve established what we are going to do and why we’re doing it, let’s talk about how. In this section, I’ll talk about a roadmap leading to an ML Service, with resources that once helped me along the way
-
Be comfortable with UNIX commands and a version-control system like Git
Git is fundamental to the software development lifecycle. There’s a learning curve involved, but the benefits are tremendous. As a bonus, create a profile on your preferred Git-hosting server—Github, Gitlab, etc.— and enjoy the full-suite of the Git experience!
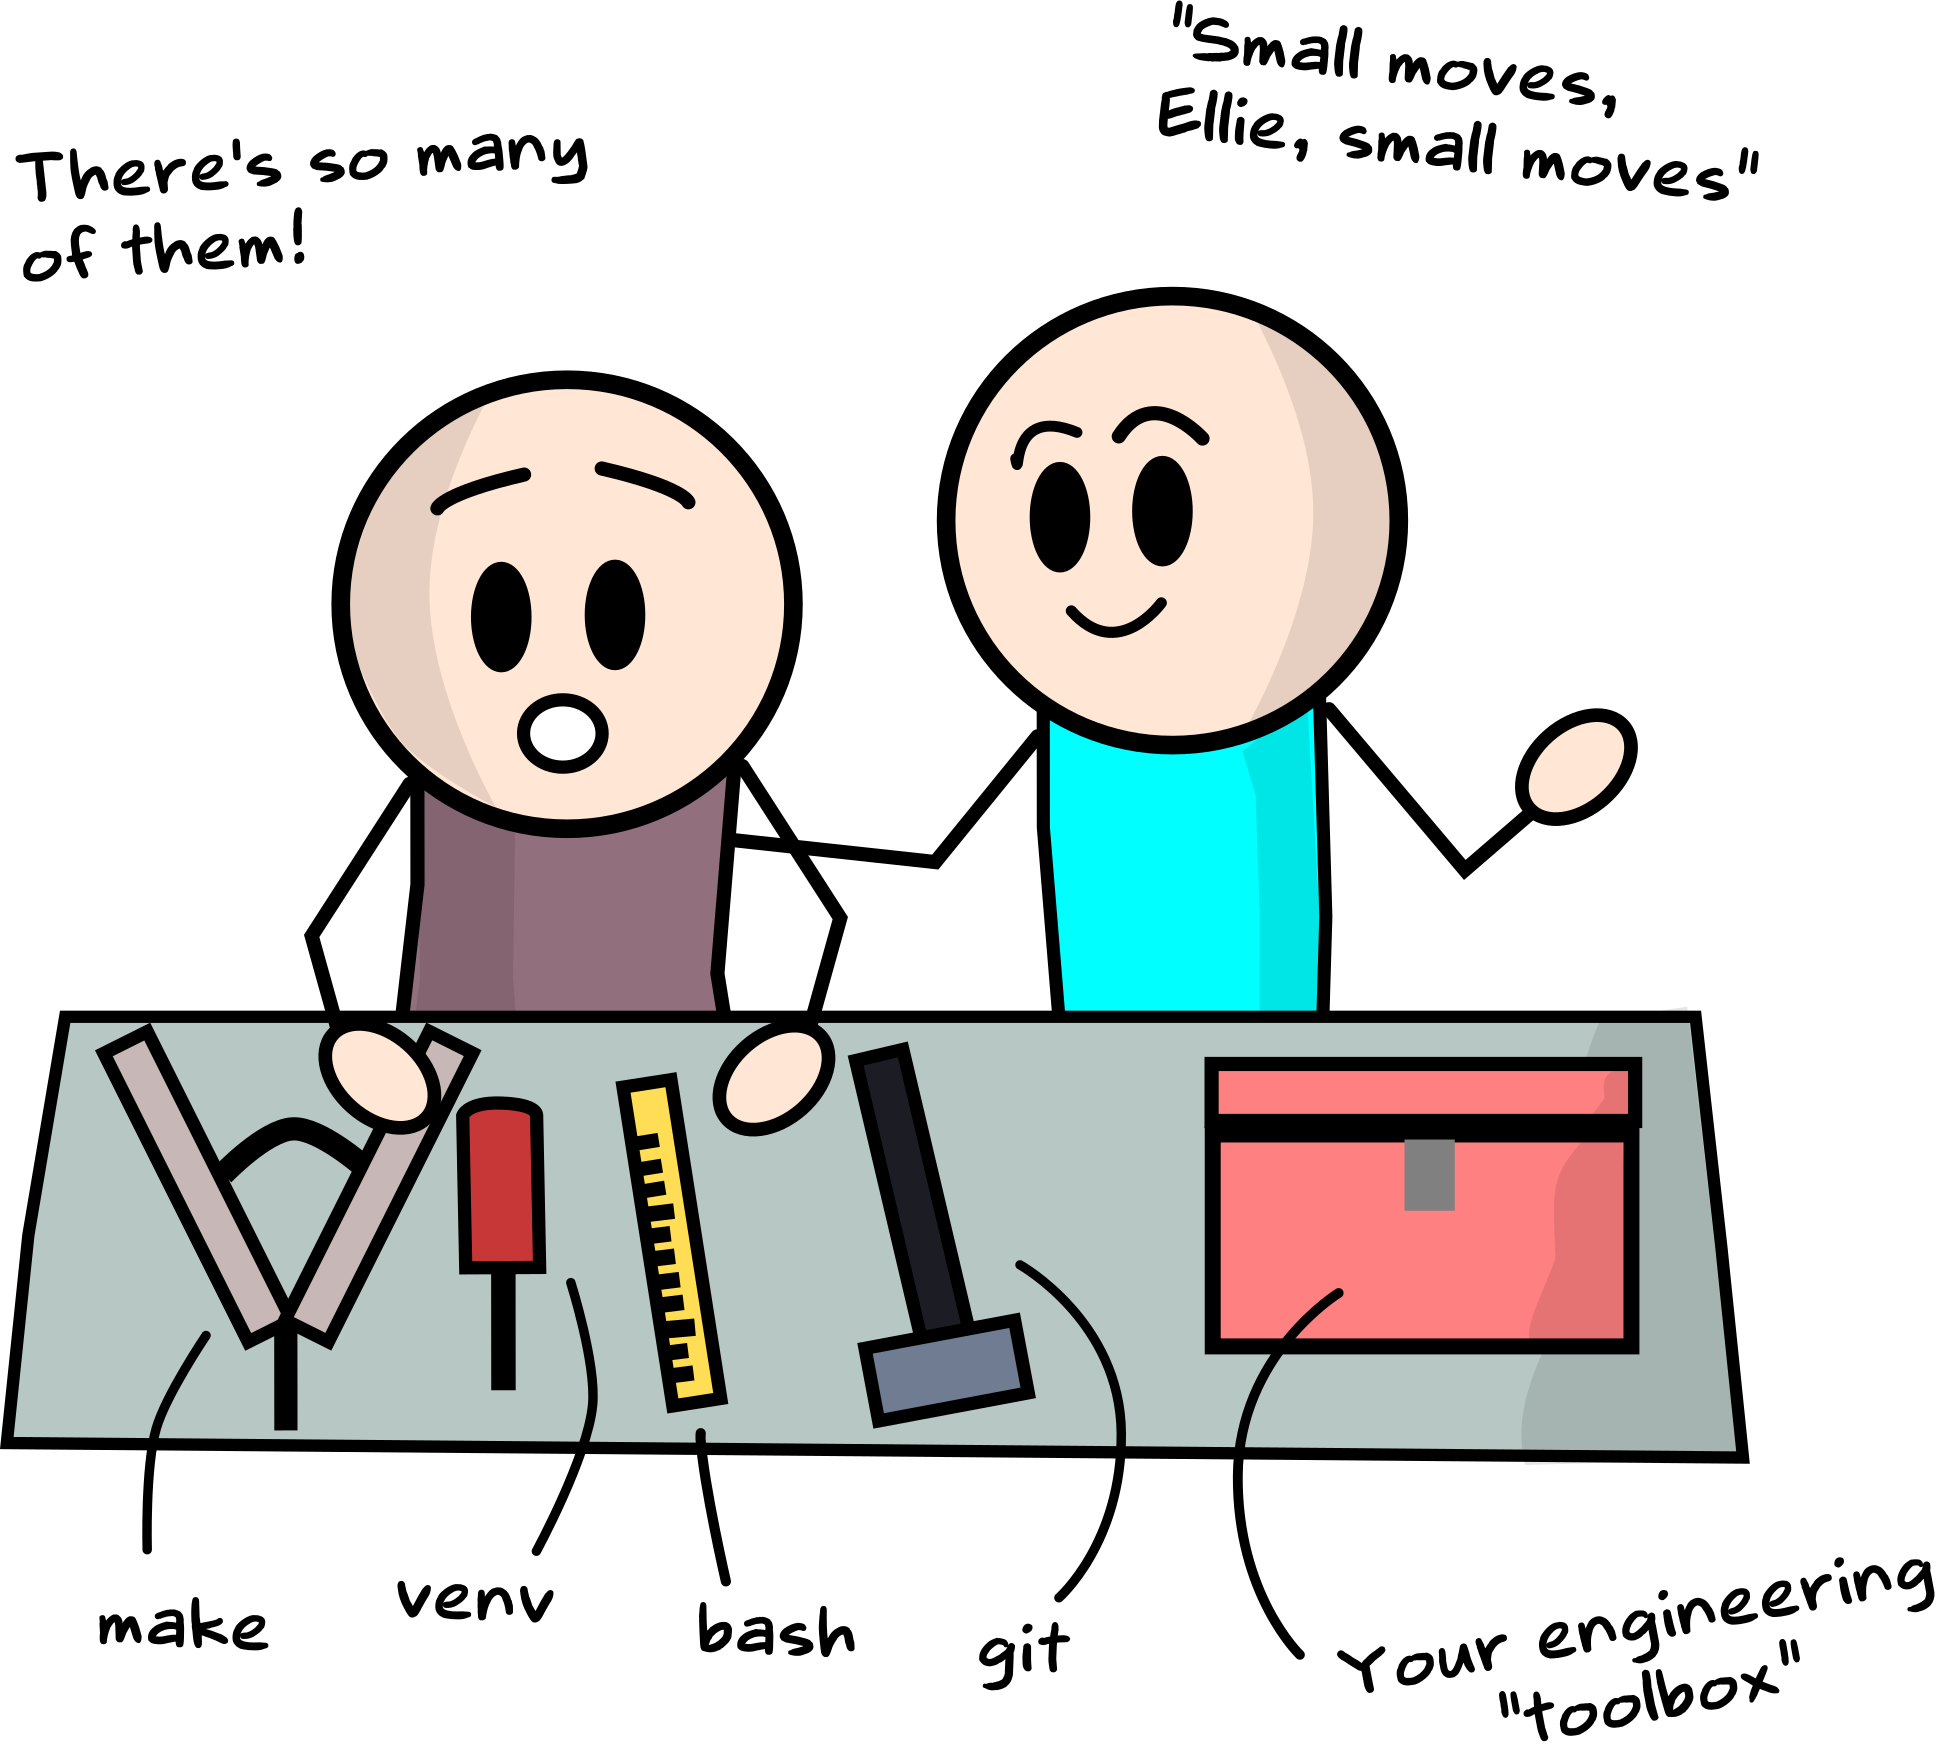
Figure: Little by little we add new tools to your toolboxKey Activities:
-
Learn how the standard commands work: git status, git add, git commit, git push/pull. I highly-recommend Github’s Git introduction for this. In addition, explore git using this visualization tool.
-
Learn the basics of Git branching. Understand the difference between rebase and merge, and learn the merge policies within your team. In addition, try-out this fun branching visualization tool to see various ways to move around your Git history.
-
Cap-off your Git proficiency by learning how to write good commit messages. Chris Beams wrote a nice blogpost on how to structure and word them. It’s something I always recommend to anyone learning git!
-
Learn basic bash scripting and how to get around a Linux terminal. Most production servers run on Linux, so it’s good to be comfortable with it.
Another course that I highly-recommend is Software Carpentry’s Git fundamentals. It is aimed primarily to researchers and scientists like us, and introduces version-control in the context of open science and reproducibility.
-
-
Structure your Python project in a modular fashion
For most of us in Machine Learning or Data Science, our introduction to Python programming is through Jupyter notebooks. It works for ad-hoc analysis and reporting, but in software development, it is more preferred to migrate our scripts into modules. That means pure Python
.pyfiles, properly directed directories, and well-defined dependencies.
Key Activities:
-
Learn different Python application layouts from this Real Python tutorial. For our Machine Learning Service, we will follow the Flask layout (also applicable if we’re using other web server libraries like FastAPI).
-
Study the more expressive layout with internal packages. In my opinion, it catches all use-cases if you want to write a library, web application, or command-line tool.
-
Learn from open-source project structures by including a sensible README, changelog, and documentation. I highly-recommend Hitchhiker’s Guide to Python as an entrypoint for these practices. Furthermore, I encourage you to checkout best practices from open-source repositories like fastai, huggingface’s transformers, and streamlit. Learning how to read and learn from other’s code can help improve your “code-sense.”
-
Write your ML application in a modular fashion. Again, follow the guidelines on project structure from the recommendations above, but if you wish to have an opinionated structure, I often opt for this layout:
  my_project/
  ├── api
  ├── docs
  ├── experiments
  ├── README.md
  ├── requirements.txt
  ├── src
  │   ├── entrypoint.py
  │   └── my_module
  │       └── module_file.py
  └── tests
      ├── my_module
      │   └── test_my_module.py
      └── test_entrypoint.py
During this step, I also encourage you to write a small utility library for the common functions that you use in your day-to-day work. You can, for example, extract all functions that repeat often from your Jupyter notebooks, refactor them, and reuse them anywhere. After accomplishing all these activities, I’m confident that your software engineering skills will have grown by a lot!
-
-
Learn how to write an API on top of your model using Flask or FastAPI
For this step, the goal is to learn how to create simple web servers. More often than not, the primary mode of communication between two applications is through HTTP. What we’re virtually doing here is exposing an interface for other users (computers or humans), to talk to our machine learning app.
Key Activities:
-
Learn
requests, a commonly-used library for interacting with web servers. More particularly, understand when to use GET and POST requests, different HTTP status codes, and various types (read: mimetypes) returned by a web-server. -
Create a web-server using a framework of your choice. Right now I recommend learning FastAPI: it’s fully-featured, easy-to-use, and powerful. Create GET and POST endpoints that returns your model’s output in accordance to the relevant mimetype. Another good option is Flask, it’s an “older” framework, thus widely-used.
-
(Optional) Learn other serving technologies specifically-built for ML such as Tensorflow Serving, Kubeflow Fairing, or Cortex. These may not follow the “traditional” way of serving ML models, but it may be nice to experience how it’s done with highly-specialized tools.
To get started, I highly-recommend looking at the “First Steps” documentation of FastAPI. Moreover, I encourage you to check-out this huge list of tutorials for FastAPI! It’s complete, and gets you up and running in no time. You can then start “wrapping” your model’s
predict()functions with API endpoints, so that it can start serving requests to users.In addition, you might also want to take a look at best practices and conventions in naming your endpoints in a RESTful way. It is a scheme commonly followed by web engineers, and it’s nice to speak the same language.
Optionally, I’d recommend that you also learn socket programming, and understand the tradeoffs between web-sockets and HTTP. Here’s a good StackOverflow answer that highlights their differences— there’s a latency advantage for web-sockets, but I think for our most common use-case, learning HTTP is enough.
-
-
“Containerize” your application using Docker
After structuring your Python application in Step #2, and having your server up-and-running in Step #3, the next step is to package your application with all its dependencies using Docker.
Docker images are built using a Dockerfile— think of it as a recipe. It contains a series of steps to install all necessary dependencies (gather ingredients) and run specific commands (simmer, fry, mix and match) to faithfully reproduce your application.
You want to use Docker for two things: (1) reproducibility and (2) isolation. The former ensures that everytime you “cook” (build the Docker Image), it’s always the same food all throughout (same Image). The latter provides you with a “sandbox kitchen” where only the ingredients you specified exist: I only need a pot, chicken, vinegar, and soy sauce. There’s no chance that an extra ingredient, say sugar, will inadvertently mess up my cooking.
Key Activities:
-
Learn the differences between an Image and a Container. There is a good StackOverflow answer that explains their use, and how to reason about them. These two terms are often used in the software engineering world that it is important to get the fundamentals right. Also, before you start, I highly-recommend this Docker roadmap to fill-in your learning needs regarding the technology. Vladislav’s blogpost is also rich with information about anything Docker.
-
Learn basic docker commands by playing on the Python Docker image. More specifically, learn the most common ones:
pull/push,build,tag,run/exec,ps/log. I highly-recommend the Docker Curriculum website that puts you up to speed on using Docker in action. -
Write a Dockerfile for your web application. Now that you know how to play around a Docker image, it is time to make your own! Again, the Docker Curriculum gives you an overview on how to make your own Docker image through a Dockerfile. Learn the basic directives such as
FROM,RUN,COPY, andCMD, then build your image and play with it similar to the previous step! Also, check the Dockerfile best practices from the official docs. -
Ideally, the output for this step is to run your web-server similar to Step 3, but through Docker. In Step 3 you probably ran your server by typing some commands in your terminal (
gunicorn...). On this step, it should just be as easy asdocker run my-image.
Once you get the hang of using Docker, you might want to expand your knowledge by learning:
-
Args and environment variables, to fully parametrize your images. This blogpost (and the blog in general) is my go-to reference for anything that confuses me regarding these directives.
-
Multi-stage builds, this mostly solves the problem of keeping the image sizes down. It’s good-to-know, and a cool “trick” to show-off Docker mastery. My go-to reference is always the official docs.
-
Docker Compose. How about running multiple containers at once? Compose allows you to “orchestrate” containers that relate to one another. For example in a web app, I have an image for the Frontend (made with Vue), and an image for the Backend (Python). In order for me to control them together, I use Compose. The official docs are already a good resource, but if you wish to see an example, check-out my Sprites-as-a-Service project.
-
-
Learn how to deploy to a Cloud Platform
At this point, we can hopefully see the benefits of containerization: the build process of our app is idempotent. Your application can virtually run on any machine that has Docker installed—it could be my laptop, or a server in the Cloud!
Key Activities:
-
Choose the platform of your choice. Deploying to the cloud often depends on the platform you’re bringing your application onto. For this step, I recommend looking into container-based managed services like Google Cloud Run, AWS Fargate, or Azure Container Instances Instances.
Sometimes deployment is vendor-dependent. There’s a NewStack comparison among the three major cloud platforms so I’ll let you choose. Personally, I’ve been quite happy with Google Cloud Run: it’s easy to set-up, has a free tier, and pretty fast startup time! As an example, my Sprites-as-a-Service application was deployed to Cloud Run!
Other options include Heroku and OpenFaaS. Heroku often has its preferred repository structure, while OpenFaaS still needs to be set-up. Anyhow, I can’t fully vet on them but I’ve heard good things about the two.
-
Deploy to the platform of your choice. Easier said than done. Each platform has its own deployment instructions, and you need to adapt your repo or Dockerfile based on them. For example, in Cloud Run’s deployment instructions, you need to first
pushyour image into Google Container Registry (GCR), then run somegcloudinstructions in order to deploy. -
Once deployed, test your web service! Before when you’re running locally, you test your server by making HTTP requests in
localhost. Now that you finished deploying, you should receive a URL that corresponds to your deployed app. Test it by passing inputs via cURL or Postman’ s API Client
If you received your expected output, then congratulations! You’ve deployed your web application successfully!
-
In conclusion
At this point, I can say that you are already productive and more ready to collaborate with software engineers in your team. If you’re an academic researcher, you can probably see how these software practices can be used to improve your research workflow. Congratulations!

Obviously, this is not a weekend project. Some of these might take time, and you might learn one thing before the other. More importantly, some steps can overlap: you might still be on Step 2 but already learning Steps 3 and 4— that happens.
I wrote this blogpost to provide a rough roadmap for someone who wants to learn software engineering as a researcher or data scientist. Software engineering as a field is very exciting— new technologies pop-up everyday and there’s always something new to learn! I hope that you, reader, put in the patience and drive to go from learning Git to deploying ML web applications into the Cloud! If so, then you’ve achieved a lot and as a random stranger I’m proud of you!
What’s next?
From here on in, you can keep improving your app by:
- Minimizing the size of your Docker image using multi-stage builds.
- Cleaning-up your repository. Model files shouldn’t be committed but stored in a storage service (e.g. Google Cloud Storage or AWS S3)
- Adding a Continuous Integration / Continuous Deployment (CI/CD) pipeline
so that any change on Github is automatically reflected on your
deployed app. I often use Github
Actions for this (e.g., any
change in the
masterbranch is deployed automatically). - Improving security! Make use of Docker args or
.envto secure API tokens, passwords, and whatnot. Ideally you shouldn’t be committing any secrets on Git (it can still be recovered if you deleted it!). Be careful!
Lastly, I highly-recommend the following resources for general guidance:
- The Twelve Factor application: this is a set of principles to guide you in building industry-grade applications. As you can see, we haven’t covered concurrency, dev/prod parity, and logs in this post.
- Designing Data Intensive Applications by M. Kleppmann: a pretty good textbook for learning various architectures and first-principles in building more complex apps. As it turns out, ML is quite complex in a software standpoint— you need to worry about concept drift, ML testing, data version control, and more! I think this book gives you the handle to solve such difficult problems.
- PEP8 Style Guide for Python Code: most of us write in Python, so it’s good to learn idiomatic ways to speak the language. This guide can help ensure that you’re writing “good” Python code.
- Fluent Python by L. Ramalho: a good book for advanced Python users. This is a good book that made me appreciate the standard library more!
- Object-oriented programming (OOP), Functional Programming (FP) and design patterns: I think that OOP is a good handle for writing most ML applications. Of course, not everything should be a class. Functional Programming (FP) is also a good framework, and some of its principles can help us write cleaner and more testable code.
FAQ
- Why didn’t you include X? You should include X: I try to make the roadmap as overarching as possible to allow some wiggle room for technology X. I think that if I write down all possible tech and processes, then this can blow up into a book (hmm…)!
- Is this for data scientists or ML Engineers?: To be honest, the roles are quite blurred across the industry. I often see this profile of a good researcher who can code and produce good models, but the code cannot easily be deployed to production. I see myself writing for them!
- I am an academic, will this be useful?: I absolutely believe so! Open science runs on the idea of reproducibility— not only your paper is accessible, but also the ingredients and the process from which your results were generated. I think learning Docker or properly modularizing your code can go a long way.
Changelog
- 05-10-2021: Quite glad that some Redditors resonated with the post! Thanks for the gold too! You can check out the interesting thread below:
- 05-08-2021: Thanks a lot for the Youtube shoutout Daniel Bourke! I highly-recommend looking into his Zero-to-Mastery newsletter, it gave me a good view of newsworthy ML stuff I missed!
- 04-26-2021: Added more resources for FastAPI. I actually just linked it from this site. If you’re looking for more resources, I suggest looking at that link!
- 03-19-2021: Added more resources for Flask and FastAPI based from feedback from Chip Huyen’s ML Systems Design Discord Server.